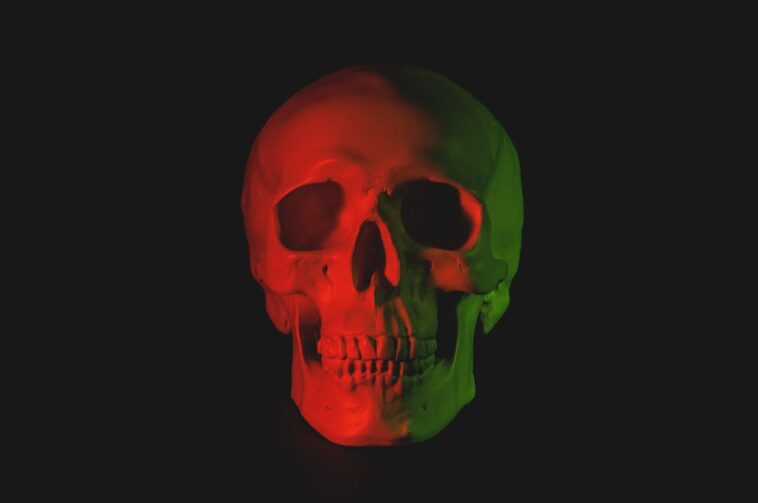
So, you want to learn how to draw a skull? Awesome! Skulls might seem a little spooky, but they’re actually really interesting to draw. Whether you’re into art, Halloween decorations, or just want to try something new, I’m here to guide you through the process, step by step. Don’t worry if you’re not a professional artist; this tutorial is designed for beginners. Grab your pencils and paper, and let’s get started!
Why Draw Skulls?
Before we jump into the how-to, let’s talk about why drawing skulls can be so cool. First off, it’s a great way to practice your understanding of anatomy. Skulls are made up of basic shapes, so learning to draw one helps you understand how those shapes fit together. Plus, skulls are a classic artistic subject. From gothic art to Day of the Dead celebrations, skulls appear in all sorts of styles and cultures. Finally, it’s just plain fun! There’s something satisfying about creating your own unique skull drawing.
Materials You’ll Need
You don’t need a ton of fancy art supplies to draw a skull. Here’s a simple list to get you started:
- Pencil: A regular HB pencil is perfect for sketching. You might also want a softer pencil (like a 2B or 4B) for shading.
- Eraser: A good quality eraser is essential for correcting mistakes and cleaning up your drawing.
- Paper: Any type of drawing paper will work.
- Optional: A ruler can be helpful for drawing straight lines, especially in the beginning stages.
That’s it! You probably already have most of these things lying around.
Step-by-Step Guide to Drawing a Skull
Step 1: The Basic Shape
Start by drawing an oval. This oval will represent the main shape of the skull. Don’t worry about making it perfect; it’s just a guideline. Think of it like drawing an egg standing on its wider end.
Step 2: Adding the Jawline
Below the oval, sketch a smaller, U-shaped curve. This will be the jawline. The bottom of the U should be slightly narrower than the width of the oval above it. The jaw doesn’t connect directly to the oval yet.
Step 3: Connecting the Jaw
Now, connect the oval and the U-shaped jaw with two lines on either side. These lines should angle slightly inward as they connect, creating the sides of the skull. Erase the part of the oval that overlaps with the jawline.
Step 4: Dividing the Face
Draw a vertical line down the center of the oval. This will help you keep the features symmetrical. Then, draw a horizontal line about a third of the way down from the top of the oval. This horizontal line will be the brow line, where the eye sockets will go.
Step 5: Sketching the Eye Sockets
On either side of the vertical centerline, draw two almond-shaped or rounded rectangular shapes for the eye sockets. These should be positioned along the horizontal brow line. Remember that eye sockets aren’t perfectly round; they have a slightly more angular shape. Don’t make them too big!
Step 6: Drawing the Nose Hole
Below the eye sockets, in the center of the face, draw a heart-shaped or upside-down pear shape for the nasal cavity (nose hole). This should be positioned so the top of the heart touches or slightly overlaps the bottom of the oval shape.
Step 7: The Cheekbones
Draw the cheekbones as curved lines that start near the bottom of the eye sockets and sweep down towards the jawline. These lines give the skull its depth and structure. They are not perfectly symmetrical in real skulls so don’t worry about perfection!
Step 8: Sketching the Teeth
Now, for the teeth! This can seem daunting, but break it down. Draw a horizontal line below the nose hole to indicate where the top teeth will start. Then, sketch in small, rectangular shapes for the teeth. Don’t try to draw every single tooth perfectly; just suggest the general shape and arrangement. Remember, the teeth are set into the jawbone.
Step 9: Refining the Jaw
Refine the shape of the jawline. Give it some curves and angles to make it look more realistic. Add a slight point at the chin. Also, erase any unnecessary guidelines.
Step 10: Adding Details and Shading
This is where you can really bring your skull to life! Add details like cracks, shadows, and texture. Use shading to create depth and dimension. Think about where the light is coming from and add darker shadows on the opposite side. Cross-hatching (drawing intersecting lines) is a great technique for shading.
Tips for Drawing Realistic Skulls
Here are a few extra tips to help you create a more realistic skull drawing:
- Study real skulls: Look at pictures of real skulls or even better, try to find a 3D model online or in a museum. This will help you understand the anatomy and proportions better.
- Pay attention to symmetry: While skulls aren’t perfectly symmetrical, they are mostly symmetrical. Use your center line as a guide to keep things balanced.
- Use different pencil grades: Experiment with different pencil grades (HB, 2B, 4B) to create different values and textures.
- Don’t be afraid to erase: Erasing is a part of the drawing process. Don’t be afraid to make mistakes and correct them.
- Practice, practice, practice: The more you practice, the better you’ll become at drawing skulls. Don’t get discouraged if your first few attempts aren’t perfect.
Remember, it’s okay to use references! Even professional artists use references to help them create accurate and realistic drawings.
Adding Your Own Style
Once you’ve mastered the basic skull drawing, you can start to experiment with your own style. Try adding different details, like flowers, tattoos, or hats. You can also change the proportions or exaggerate certain features to create a more stylized look. Don’t be afraid to get creative and have fun!
Common Mistakes to Avoid
Here are some common mistakes that beginners make when drawing skulls, and how to avoid them:
- Eye sockets that are too round: Remember, eye sockets are more almond-shaped or rectangular than perfectly round.
- Teeth that are too perfect: Real teeth are often slightly crooked or uneven.
- Ignoring the cheekbones: The cheekbones are important for giving the skull its structure and depth.
- Not using enough shading: Shading is essential for creating a sense of depth and realism.
Different Skull Styles
There are many different styles of skull drawings. Some artists prefer realistic depictions, while others prefer more stylized or cartoonish versions. You can also find skulls in various cultural contexts, such as the sugar skulls used in Day of the Dead celebrations.
Frequently Asked Questions (FAQ)
What’s the best way to learn skull anatomy?
The best way to learn skull anatomy is to study real skulls or anatomical diagrams. There are many resources available online and in libraries.
How long does it take to draw a good skull?
The amount of time it takes to draw a good skull depends on your skill level and the level of detail you want to achieve. A simple sketch might take 30 minutes, while a more detailed drawing could take several hours.
What if I’m not good at drawing?
Everyone can learn to draw! It just takes practice and patience. Don’t get discouraged if you don’t see results immediately. Just keep practicing and you’ll improve over time.
Can I use a digital drawing tablet?
Absolutely! You can use a digital drawing tablet to draw skulls. The same principles apply, whether you’re drawing on paper or digitally.
Drawing a skull is a fun and rewarding artistic challenge. By following these steps and practicing regularly, you’ll be able to create your own amazing skull drawings in no time. So grab your pencils, get creative, and most importantly, have fun!


GIPHY App Key not set. Please check settings