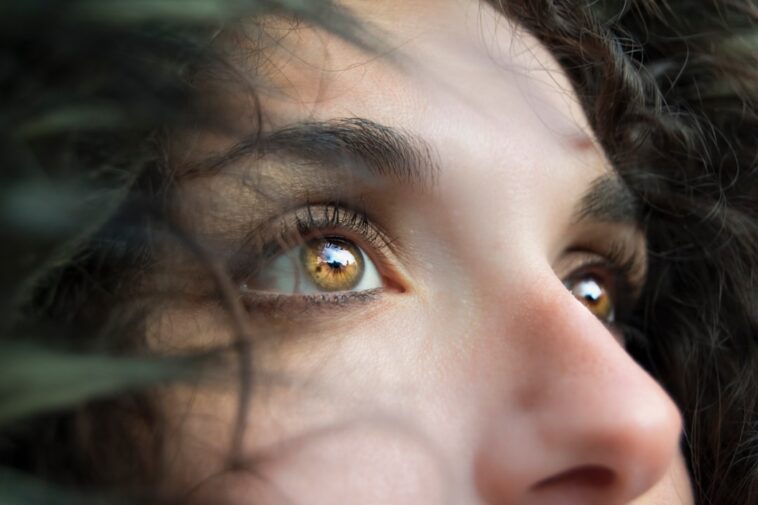
Have you ever wanted to draw a portrait but felt intimidated by the eyes? Eyes are often called the windows to the soul, and capturing them correctly can bring your drawing to life. Don’t worry; drawing eyes doesn’t have to be super difficult! This guide will break down the process into easy-to-follow steps, so you can start creating realistic and expressive eyes in no time.
Understanding the Anatomy of an Eye
Before we start drawing, it’s helpful to understand the basic parts of an eye. This will help you create more realistic and believable drawings. Think of the eye as a sphere partially hidden by the eyelids.
- The Iris: This is the colored part of your eye. It’s a circle that sits inside the eye.
- The Pupil: The black dot in the center of the iris. It lets light into your eye.
- The Sclera: This is the white part of your eye.
- Eyelids: These protect your eye. The upper eyelid usually covers a bit of the top of the iris. The lower eyelid sits just below the iris.
- Eyelashes: These are the hairs that grow from your eyelids. They help keep dust and debris out of your eyes.
- Lacrimal Caruncle: That small, pinkish bump in the inner corner of your eye.
Knowing these parts and how they relate to each other will make a huge difference in your drawings.
Step-by-Step Guide to Drawing an Eye
Let’s get started! Here’s a simple guide to drawing a realistic eye:
- Draw the Basic Shape: Start with a light sketch of an almond shape. This will be the outline of the eye. Don’t make it too pointy; round it out a bit.
- Add the Eyelids: Draw the upper and lower eyelids. Remember that the upper eyelid usually covers a small portion of the iris. The lower eyelid sits just below the iris. Give them some thickness; they aren’t just lines.
- Sketch the Iris and Pupil: Draw a circle for the iris inside the eye shape. Don’t draw a complete circle – the eyelids will cover parts of it. Then, draw a smaller circle in the center of the iris for the pupil. Make sure the pupil is perfectly centered.
- Add the Highlights: This is crucial for making the eye look realistic! Decide where your light source is coming from and add a small, white highlight or two to the iris. Highlights make the eye look wet and alive.
- Draw the Eyelashes: Eyelashes grow from the eyelids. They usually curve upwards from the upper eyelid and downwards from the lower eyelid. Don’t draw them as straight lines; give them a slight curve. Also, the eyelashes on the upper lid are usually thicker and longer than those on the lower lid. Vary the length and thickness of the lashes to make them look more natural.
- Shading and Details: Now it’s time to add depth and dimension. Shade the upper eyelid to create a shadow over the eye. Add subtle shading to the iris, leaving the highlight areas untouched. You can also add some shading to the sclera (the white part), but keep it very light. Remember, nothing is perfectly white.
- Add the Lacrimal Caruncle: Draw that small, pinkish bump in the inner corner of the eye. Adding this small detail makes the eye look much more realistic.
- Refine and Erase: Take a step back and look at your drawing. Are there any areas that need adjusting? Erase any unnecessary lines and refine the details.
Tips for Drawing Realistic Eyes
Here are some extra tips to help you improve your eye drawings:
Observe Real Eyes: The best way to learn how to draw realistic eyes is to study real eyes. Look at photos of eyes, or even better, observe the eyes of people around you. Pay attention to the details: the shape of the eyelids, the way the eyelashes grow, and the subtle variations in color and shading.
Practice Different Eye Shapes: Eyes come in all shapes and sizes. Experiment with drawing different eye shapes to broaden your skills. Try drawing almond-shaped eyes, round eyes, hooded eyes, and more.
Pay Attention to the Eyelashes: Eyelashes are often overlooked, but they’re an important part of the eye. Don’t just draw a few straight lines. Instead, draw individual lashes that curve and vary in length and thickness.
Use References: Don’t be afraid to use references! It’s perfectly okay to look at photos of eyes while you’re drawing. Using references can help you get the proportions and details right.
Don’t Be Afraid to Experiment: Try different techniques and styles to find what works best for you. There’s no one “right” way to draw eyes. The most important thing is to have fun and keep practicing!
Consider Emotions: Think about the emotion you want the eyes to convey. Slightly upturned corners can suggest happiness, while a furrowed brow above the eyes can indicate worry or anger. Subtly altering the eyelids and eyebrows can drastically change the perceived emotion.
Common Mistakes to Avoid
Here are some common mistakes that beginners make when drawing eyes:
Drawing Eyes Too Flat: Remember that the eye is a sphere. Avoid drawing the eye as a flat shape. Use shading to create the illusion of roundness.
Drawing the Iris as a Perfect Circle: The eyelids cover parts of the iris, so don’t draw a complete circle. Make sure the iris is partially hidden by the eyelids.
Making the Eyelashes Too Uniform: Eyelashes are not all the same length and thickness. Vary the length and thickness of the lashes to make them look more natural.
Forgetting the Highlights: Highlights are essential for making the eye look realistic. Don’t forget to add a small, white highlight or two to the iris.
Frequently Asked Questions (FAQ)
What kind of pencil should I use to draw eyes?
A variety of pencils can work, but a set of graphite pencils ranging from 2H to 6B is a great starting point. The harder pencils (2H) are good for light sketching and details, while the softer pencils (6B) are perfect for shading and creating darker values.
How do I make the eye look wet?
The key to making an eye look wet is the highlights! Adding small, bright highlights to the iris and even a tiny highlight on the lower eyelid will give the illusion of moisture.
How do I draw different eye shapes?
Pay close attention to the overall shape of the eye (almond, round, etc.) and the shape and placement of the eyelids. Observe real eyes and try to capture the subtle differences in shape and proportion.
How do I draw realistic eyelashes?
Draw individual lashes that curve and vary in length and thickness. The eyelashes on the upper lid are usually thicker and longer than those on the lower lid. Don’t draw them as straight lines.
Drawing eyes can seem daunting at first, but with practice and patience, anyone can learn to create beautiful and realistic eye drawings. Remember to observe real eyes, use references, and don’t be afraid to experiment. Most importantly, have fun and enjoy the process! With each drawing, you’ll improve your skills and develop your own unique style.


GIPHY App Key not set. Please check settings